Three top tips for designing interactive prototypes with Penpot
Find out the top three tips to help you make great prototypes with Penpot every time. Use the following tips to level up your Penpot skills.

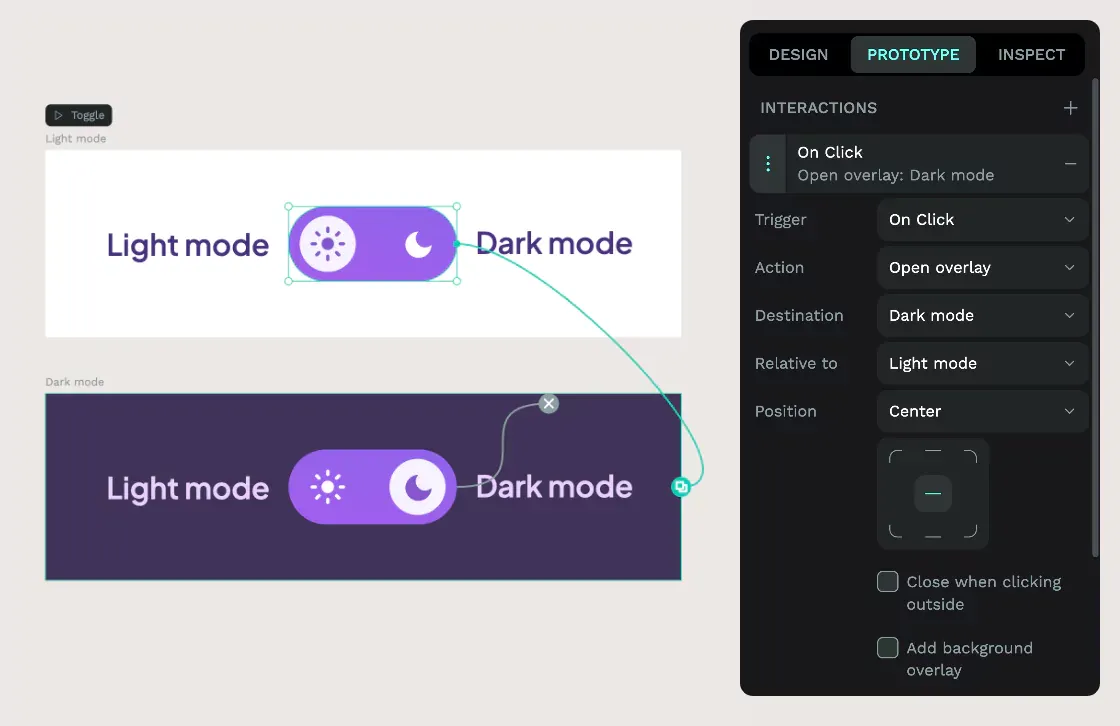
Interactive prototypes are a great way to share how you want your design to behave when they’re live. You can easily mimic navigation and overlay behaviors, and even model state changes. Check out our tutorial featuring these examples. Then, use the following tips to level up your Penpot skills.
1: Use flows to demonstrate user journeys with your prototypes
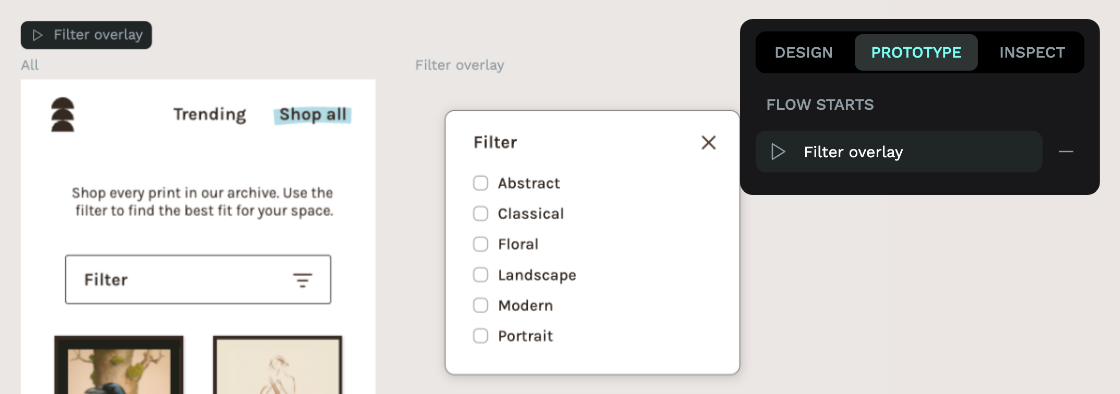
The flow option in the Prototype panel allows you to create multiple flows through the interactions and boards on your page with different starting points. Flows are helpfully indicated with play icons on the canvas so collaborators can quickly jump into View mode to click through your prototype. Even if you only have one group of interactions on your page, I recommend you create a flow to ensure the prototype starts on the correct board when you enter View mode.
2: Animations make your transitions feel refined
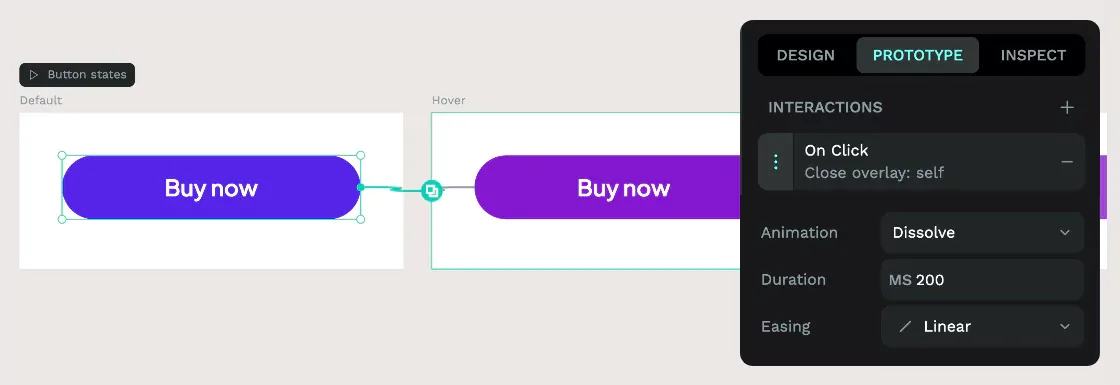
When you’re working on a high-fidelity mockup, animations can make the transitions in your prototype feel polished. Add a Dissolve animation to your interaction and choose a suitable duration. 100ms creates a subtle state change, 200ms smoothes out a transition, and 300ms and longer will create a slower, more deliberate and noticeable animation. The difference between easing options is more obvious on transitions with longer durations. Try them out and see which one you like best!
Dissolving animations are simple for developers to recreate using CSS transitions. Maybe don’t add animations to page transitions. Websites and most web apps don’t have transitions on page loads… though this can be a fun suggestion to bring up with your developer friends if you want to watch them sweat. 😈
3: Use the interactions menu to provide or hide cues
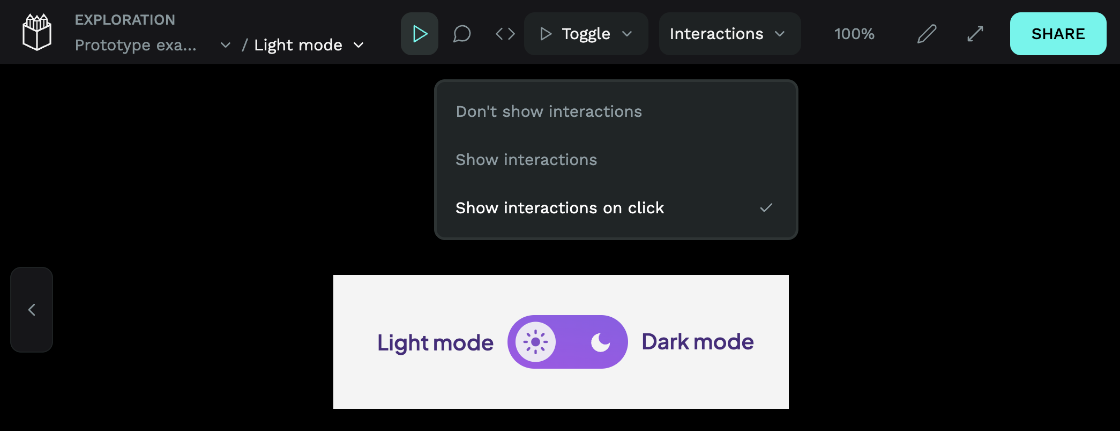
At the top of View mode is an Interactions menu with options that can make your prototype easier to click through or just like the actual product.
- Use “Show interactions” to overlay interaction cues over your prototypes, making it obvious where it is interactive.
- Use “Show interactions on click” to overlay interaction cues briefly when you click into the prototype view.
- Use the “Don’t show interactions” option to hide any cues and make your prototypes behave more like the final product.
If you’re a developer using an interactive prototype to discover how the design should behave, using the “Show interactions” option will make it easier to spot where interactions have been added. If you’re demonstrating a prototype to stakeholders, or doing user testing, use “Don’t show interactions” to make your prototype feel real.
Interactive prototypes are one of the most valuable handoff tools in the designers’ toolbox. From demonstrating changes in state to creating clickable wireframes, you’ll never want to go back to static visuals. Check out the Penpot user guide to discover all the features for prototyping with Penpot and join our Community to be the first to find out about new features as they land.
Related Blogs
Check out our other blogs, from informative topic guides to tutorials on how to get the most out of Penpot.
 Laura Kalbag
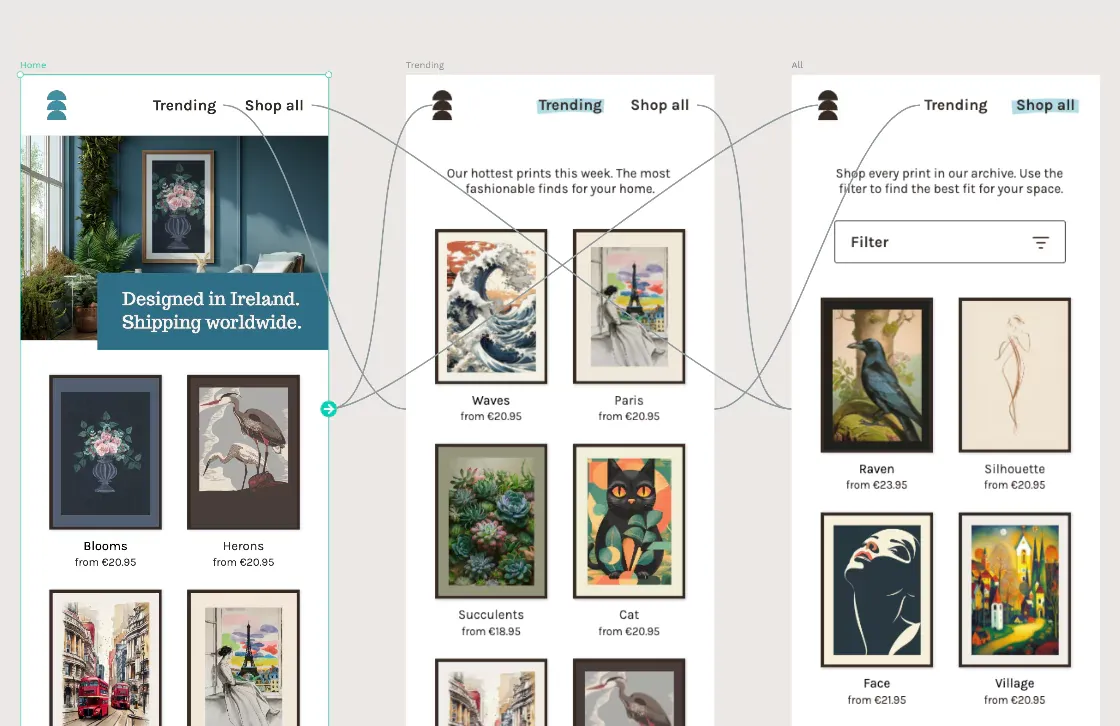 Laura Kalbag
 Paula Tienza
 Paula Tienza