How to design a mobile app for free in 7 simple steps
In this comprehensive guide, we'll roll up our sleeves and get into exactly those steps, equipping you to confidently lay the groundwork for your first mobile app. Let's get building!

In February 2024, developers released 37,000 mobile apps through the Play Store.
Each of those apps represent countless hours of dedication. From sharp creative thinking and intricate UX considerations to deep technical expertise. The common thread? A relentless pursuit of crafting meaningful, engaging experiences for the people who will ultimately use and, hopefully, love them.
However, even the most prolific apps likely started with a basic idea carried out through simple design steps you can use today. In this comprehensive guide, we'll roll up our sleeves and get into exactly those steps, equipping you to confidently lay the groundwork for your first mobile app. Let's get building!
1. Define your unique selling proposition (USP)
Go to your favorite app store and type "free weightlifting app." You'll quickly find yourself navigating a wide range of options. It’s a crowded space, no doubt. Does that mean there's no more room for another one? Not exactly. Even with a seemingly endless catalog of apps already available, the truly groundbreaking ones might still be waiting to be conceived. Your opportunity lies in precisely articulating what makes your app genuinely better and uniquely yours. This crystal-clear definition becomes the foundational blueprint for an app design that not only cuts through the noise but truly stands out in a crowded market.Ask yourself questions like:
- What would our app do better than the competition?
- Why would someone tell a friend about our app?
- What problem would our app solve that other apps don’t?
- What is someone looking for when they find our app?
Draft out the answers in a mission statement for your app. Then reduce it to one sentence: "Our app does ___ for ____" or "Our app helps ___ by ____."Think about the apps you know and love today and what you do when opening them. You expect something each time you reach for your phone. This anticipated experience, this clear promise of utility, is precisely what you need to define and bake into the very DNA of your new app.
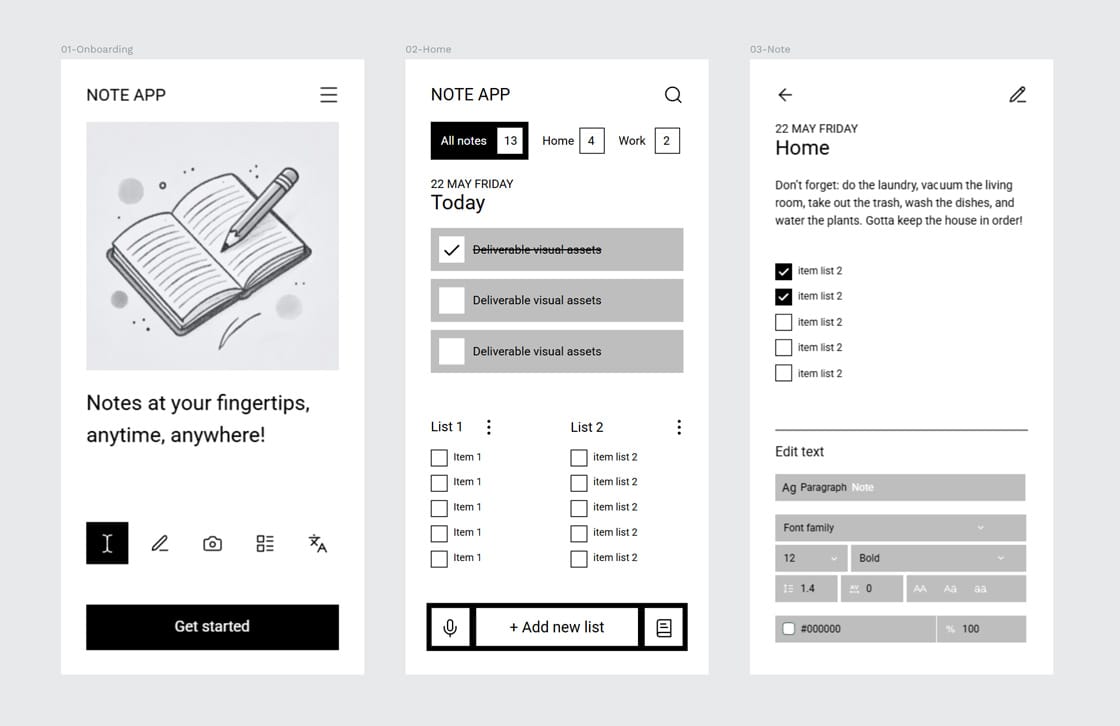
2. Sketch it out with wireframes
Now, imagine you are using the app you defined in step one. What does it look like? How do you use it?
Now it’s time to give your app idea its first, tangible form. Think of this as the digital successor to the quick napkin sketch, a rudimentary visual blueprint. This initial output is, in essence, your very first wireframe, a low-fidelity skeleton of your application. Its crucial role at this stage is to map out the core content for each screen and clearly define how a user will actually navigate from one part of the app to another.
Next, you need to plan how users will move through your app and decide all the parts it will have. This means figuring out all the different screens you'll need for what the user will do. You also need to carefully plan the exact order these screens will appear as someone uses your app. Ensure each app screen or page has its own visual representation in the wireframe.
We've created a wireframe tutorial to help you get started in Penpot. By creating it in our free tool, you can save your work and easily share your progress with others as your idea gets more sophisticated.
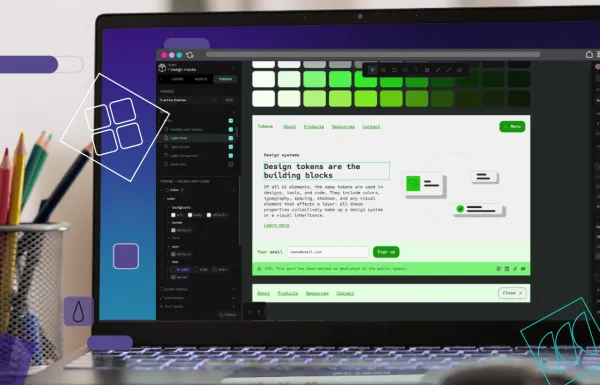
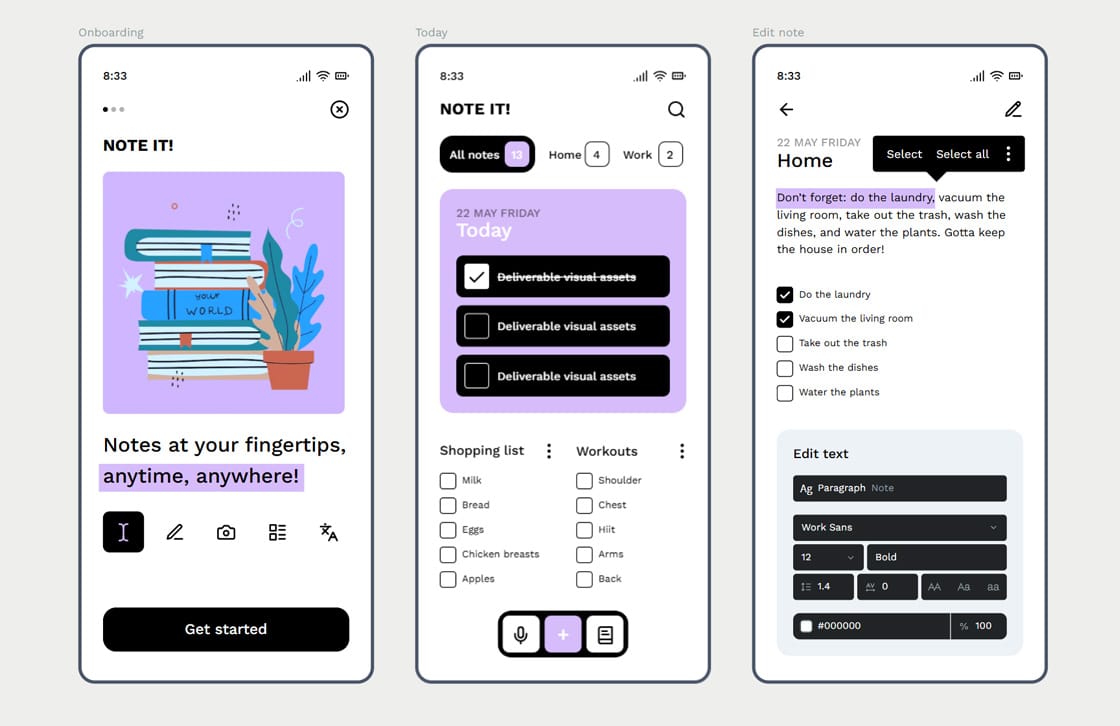
3. Design the UI of the app
Once you've decided on the app's functionality and navigation, you can move on to picking out the visual elements with an excellent User Interface (UI) design. UI is important because it's the tangible digital environment your users will immerse themselves in. It carefully encompasses every interactive element, visual cue, and piece of feedback meticulously designed to facilitate intuitive navigation and foster meaningful engagement with your application's core functionality.
The UI is brought to life through a considered application of its core visual elements: the strategic use of color, the communicative clarity of icons, the emotive power of imagery, the crucial role of spacing and layout, and the character and readability of typography. Here, you can be as creative as you like while focusing on details that help the user and truly serve a purpose.
To make the UI consistent between app pages, consider building and using templates you can reuse from page to page. Penpot's many free kits come with sample design elements that can be swapped for any of your company's custom fonts or brand colors. They offer creative inspiration if you're stuck or need to see how other companies might define UI elements.
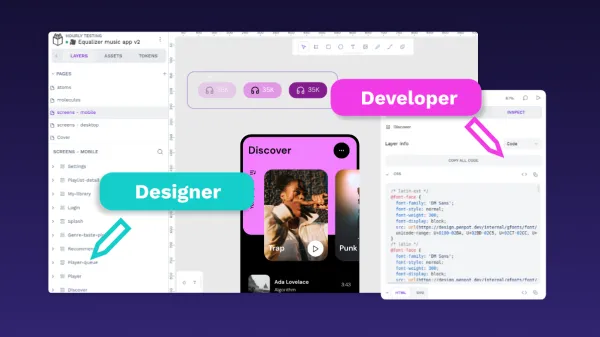
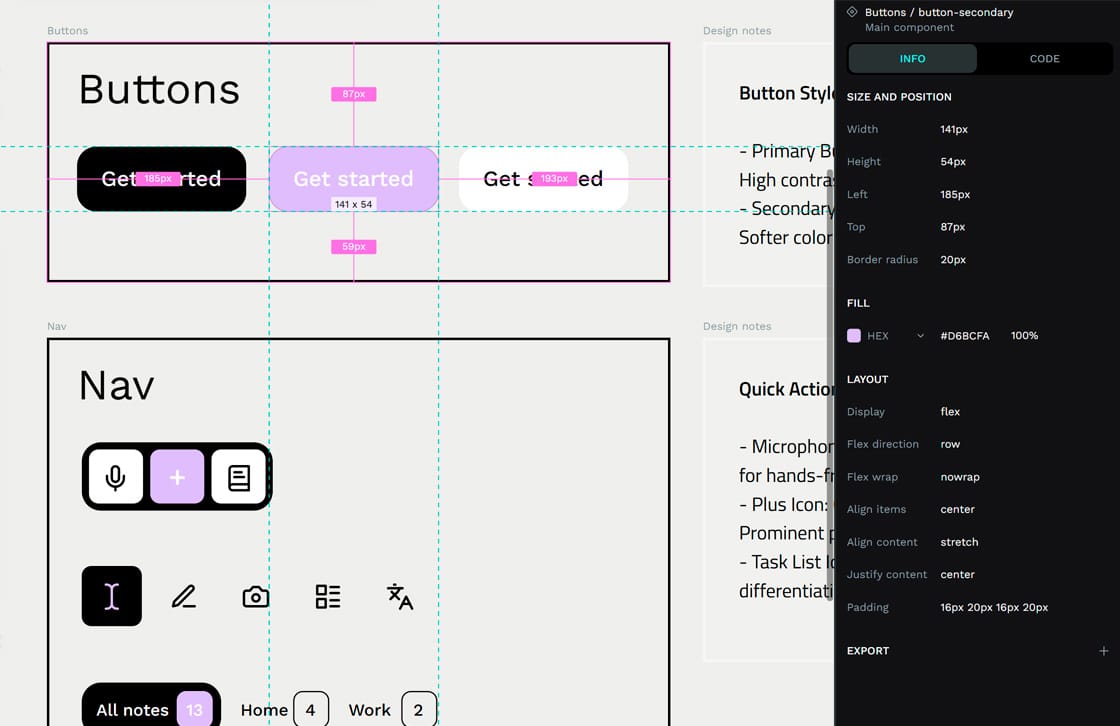
Penpot significantly aids the design-to-development workflow with its on-the-fly CSS code generation. As you design, it creates ready-to-use CSS, becoming a key asset for developers.
For implementation, developers can simply switch from the Design or Prototype views to the 'Inspect' tab. There, they’ll find clean code snippets reflecting your design, ready for integration to streamline the app's build process.
Need more inspiration? See how the best of the best create thoughtful UIs in this list of our favorite UI designs on the market today.
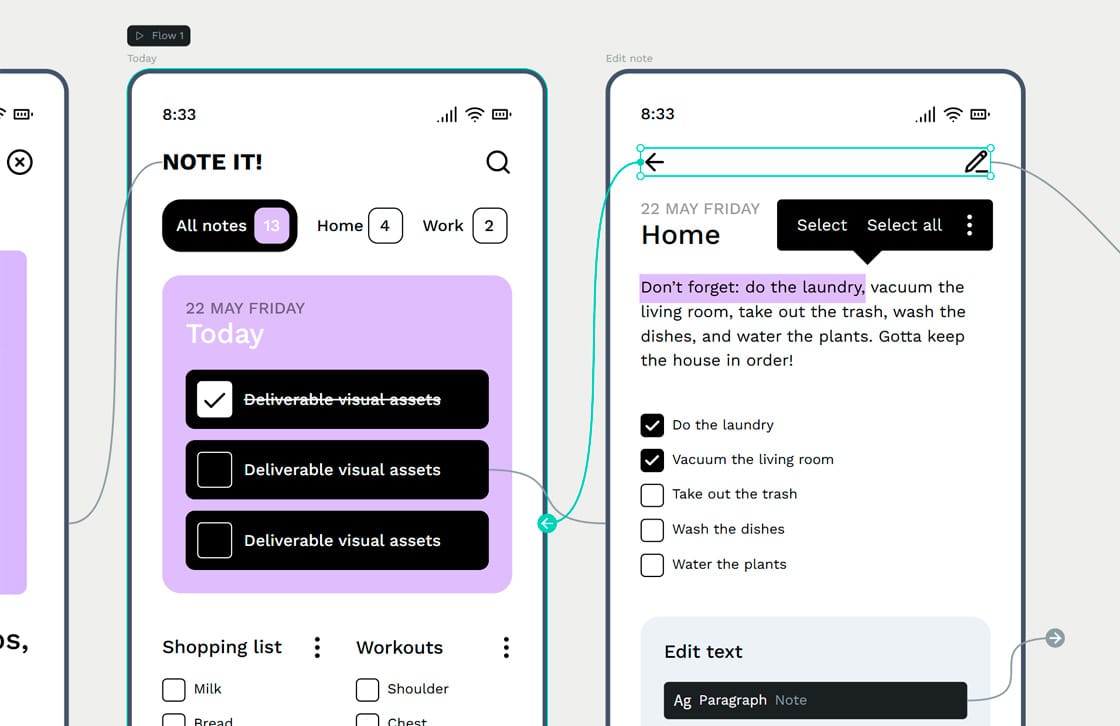
4. Build an interactive prototype
Now, we combine the wireframe and design choices to create a prototype. Your prototype is an interactive manifestation of your app's core experience. This dynamic representation is specifically crafted to be put in front of users because it convincingly simulates the functionality and navigational flow of the envisioned final product, allowing for invaluable early feedback.
It's not functional yet, as it's just pictures of the finished app. But Penpot's interactive prototype tutorial walks you through how to build a prototype so a user clicks a button or link and sees the resulting app page they would see in the real version.
One of the great things about building a prototype in Penpot is it's design-friendly — you're empowered to craft rich, interactive experiences without needing to write a single line of code. This means you can rapidly produce a tangible, high-fidelity simulation of your app, perfect for presenting compelling demonstrations to stakeholders, securing investor buy-in, or running invaluable user testing sessions, all well before the heavy lifting of development even begins.
5. Refine your design
Next, it's time to solicit feedback from the users who've seen your prototype. Collect their comments, either directly in the Penpot app or through a survey form or other digital collection method.
Penpot's collaboration features support real-time commenting from anyone, including your stakeholders. View comments, respond, and incorporate feedback as needed. You can also save new versions of your prototype and see its revision history anytime.
When you look at user feedback, try to find clear ideas to make your app better. You don't have to use every single suggestion. Instead, look for trends and patterns. See what most users find helpful or what things they think could be better.
You might find out that features you personally like aren't very useful to others, or that you need to add new features that people are asking for. Be ready to spend some time fixing or changing things you didn't expect. This is all part of making your app better for the people who use it.If you're building for someone else, this is also an excellent time to get feedback from the client. (Note: Penpot's history view keeps everyone looking at the most recent version. It's more intuitive than passing around offline mockup files, where everyone may or may not look at the correct version.)
6. Create and compare versions
If all goes well with your prototype testing, you may only have to change a few existing features and can keep much of what you already have. However, you may get conflicting information from testers or even question if you have the right design to begin with.This is where A/B testing is helpful. By making two user prototypes and seeing which performs better, you may get more tangible feedback than simply asking what people think of a single design.When users have a choice, they can often articulate their feelings better. It may be easier to say, "I like option A better because I know how to get around," rather than "The navigation menu confuses me. It's good to remember that your users are not usually designers. So, they might not know the right words to explain what's wrong with a design or what's hard to use.
That's why showing them two different designs (prototypes) is really helpful. When they can compare two options, it's easier for them to show what they like and what they don't like, even if they don't know the fancy design words. This gives you a much clearer idea of how to start improving your design.
7. Design and development in sync, thanks to Penpot
Once the design is finished, developers can start turning those ideas into a real app. This isn't just about designers handing things over; they need to work together with developers from the very beginning. It's important for designers and developers to have a few meetings at this stage. This helps everyone understand the plan and the design details clearly before a lot of coding starts.
In the past, this step was often tricky. Important details could get missed, and what designers imagined wasn't always what developers ended up building. That’s why it’s super important for designers and developers to work very closely together while the app is being built. When they team up well and talk openly, it helps avoid those old problems and makes sure the app works and looks as planned.Fortunately, the handoff is seamless if you've built your design in Penpot. Developers can access the code snippets generated by your prototype design when they click on the Inspect tab. This gives them something tangible, knowing what designers had in mind. The Inspect tab in Penpot can communicate spacing, font, color, and sizing clearly.
Build smarter with Penpot
Apps can be a significant investment of time and money, but the design process doesn't have to cost much, especially with free tools like Penpot.
Anyone with a great app idea can use these tools to draw out their first thoughts and, over time, build a prototype that feels more like a real app.
What's also great is that there are lots of free resources from the Penpot community to help you, like ready-made templates, collections of design parts (libraries), and different icon sets. These can help you start faster or make your design look better.
This means you have nothing to lose and everything to gain by starting to turn your dream app into a reality. Sign up for free today and start crafting your first design!