How to design a prototype in 7 steps (and why it’s now more than just clickable screens)
Prototypes keep design teams aligned, cutting rework and wasted effort. They act as a shared source of truth that unites designers, developers, and stakeholders—whether refining a complex flow or pitching a bold new idea.

Design teams are under constant pressure to move fast. Without a clear prototype, it’s easy to lose time in misalignment, rework, or guesswork. Whether you’re pitching a new idea or refining a complex flow, you need a shared source of truth that brings designers, developers, and stakeholders together from the start.
That’s where a prototype comes in. It acts as a planning tool that helps everyone visualize your core features and keeps the process on track. A strong prototype reduces back-and-forth, wasted resources, and costly errors.
But to gain those benefits, you need a clear strategy. Knowing how to design a prototype that supports collaboration—and connects seamlessly with development—is what makes the difference. Below, we’ll walk you through seven key steps to build prototypes that move your product and your team forward.
What a Prototype Means Today?
A design prototype is an early model of a product that mimics the finished experience in both design and functionality. Think of it as a draft version of your web page or app that shows core features and how users would interact with them.
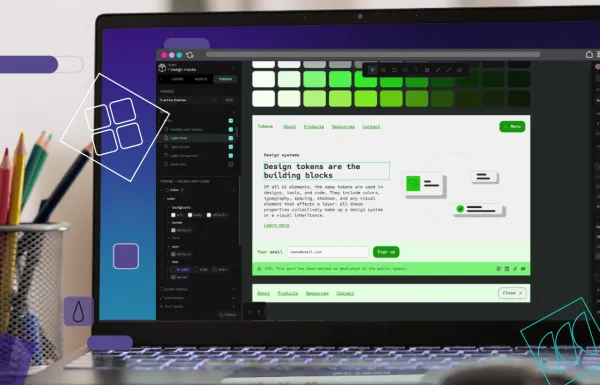
Unlike a beta product, a prototype doesn’t require full coding or production-ready engineering. But today’s tools blur that line: some prototypes include real components, design tokens, or even connections to live data. This means they are no longer just “pictures of the product,” but often the first tangible step toward building it.
Prototypes also differ from wireframes, which are more basic and focus on layout structure. A prototype is richer: it can include transitions, drag-and-drop behavior, micro-interactions, and even logic or variable states. Increasingly, they also serve as the bridge between design and code.
Why prototyping is essential for great UX
Prototypes are central to designing and developing successful products. They support the user experience (UX) by anticipating challenges, testing assumptions, and creating alignment across disciplines. Today, their role is even more powerful because they connect directly to development workflows.
Here are four key areas that prototyping supports:
1. User testing and validation
Even without full functionality, prototypes allow users to interact with flows and provide feedback.
Teams can see whether transitions feel natural, whether tasks can be completed, and where friction emerges. This validation happens early, before costly development, and increasingly includes more realistic data and conditions.
Some teams even use analytics and A/B testing during prototyping to gather measurable insights during the design phase.
2. Stakeholder alignment
Prototypes are concrete communication tools that cut through abstract explanations, where leaders, investors, and partners can experience what the product will offer before it exists.
This reduces confusion and ensures feedback is grounded in actual interactions rather than opinions alone. In many cases, prototypes double as “pitchable demos” for stakeholders, especially when built on low/no-code platforms that feel close to production.
3. Faster iteration
Prototypes are made for iteration. With collaborative platforms, teams can branch, test multiple solutions, and refine quickly.
Modern prototyping is not limited to static screens. Components, tokens, and real-time collaboration make changes faster and more systematic. Some tools even let designers work with real data or auto-generate variants with AI, speeding up cycles dramatically.
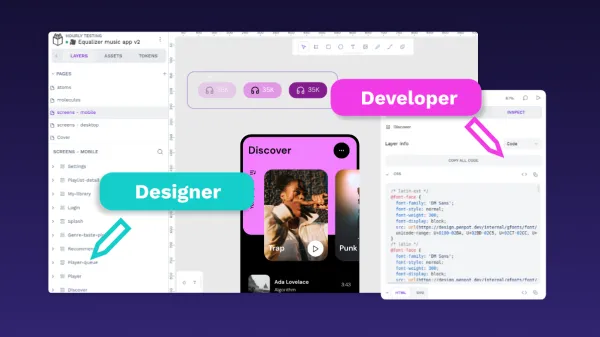
4. Better developer handoff
A well-designed prototype smooths the transition from design to development. Beyond visual specs, today’s prototypes often contain reusable components, transitions, design systems, and design tokens.
Some platforms, like Penpot, will even generate code snippets or integrate with repositories directly. This reduces misunderstandings, shortens the feedback loop, and lowers the risk of errors. In many teams, the prototype is no longer “thrown over the wall” — it’s part of the actual development pipeline.
How to design a prototype in 7 simple steps
Prototypes create immense value, but only if they are directly connected to your product outcomes. You’ll need a systematic approach that balances design goals, technical constraints, and user needs. These seven steps will guide you toward an effective prototype for any project.
Step 1: Define your goals
Start by clarifying what you want the prototype to achieve.
Do you want to test a new feature concept, validate visual design choices, demonstrate viability to stakeholders, or enhance usability?
Each goal leads to different priorities. For instance, user testing emphasizes functionality, while stakeholder demos emphasize realism and polish.
Next, document your goals and define your success metrics. These metrics might include task completion rates, error frequency, or satisfaction scores. Advanced teams also measure learning speed — how quickly the prototype helps them answer critical questions. This ensures your prototype is not just an artifact but a measurable tool for progress.
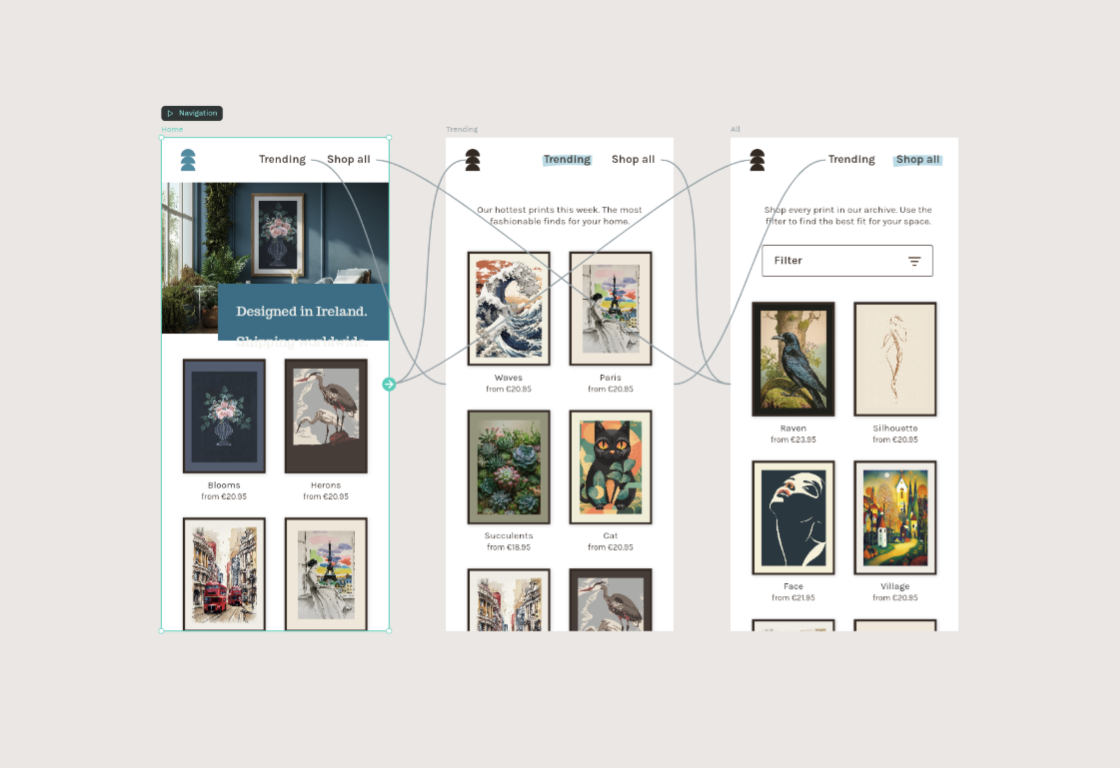
Step 2: Map user flows
User flows remain the backbone of prototyping. They chart the path from first interaction to task completion, mapping possible decisions and outcomes. Begin by identifying the most important tasks users need to achieve..
What’s different today is that flows are no longer abstract. You can map them with sample or even live data, making journeys more realistic. For example, in a payroll app, onboarding a new user is more critical than advanced reporting — yet you can also simulate edge cases, like missing data or API errors, to anticipate friction.
Step 3: Sketch your screens and layout
Visual planning starts with low-fidelity sketches to establish structure and hierarchy. Use simple shapes and notes to outline navigation and placement of key elements. At this stage, aesthetics matter less than clarity.
Once you’re done, progress to more complex wireframes, gradually adding placeholders for UI elements. Instead of filler text, use representative sample data so users can imagine real interactions. Screen relationships should also be mapped clearly, showing how users move between states.
One way that this process has changed in the last years is that design tokens are now used from the beginning of the design process. Tokens for colors, typography, and spacing can flow directly into code, ensuring consistency across the product. Even at the sketch stage, this creates a foundation for smooth collaboration with development.
Step 4: Create your UI components
Your component library forms the foundation of the prototype. Identify recurring patterns—buttons, forms, cards, navigation—and build them as reusable components. Include multiple states (hover, active, disabled) so the prototype feels realistic.
Modern tools like Penpot, allow these components to do more than simulate. Increasingly, they are “dual-life” elements that exist both in the design file and in the developer’s repository. This creates coherence, eliminates duplication, and reduces errors. By establishing a consistent design language through tokens and components, you set up a system where design and code evolve together.
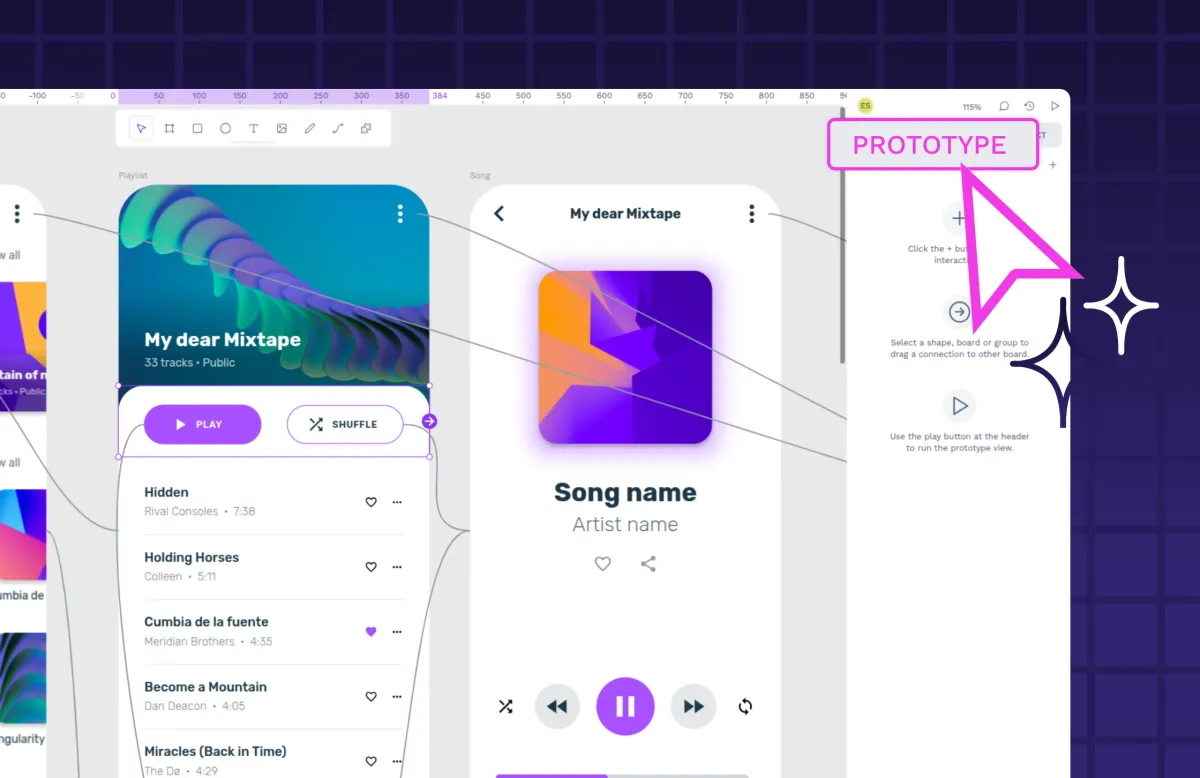
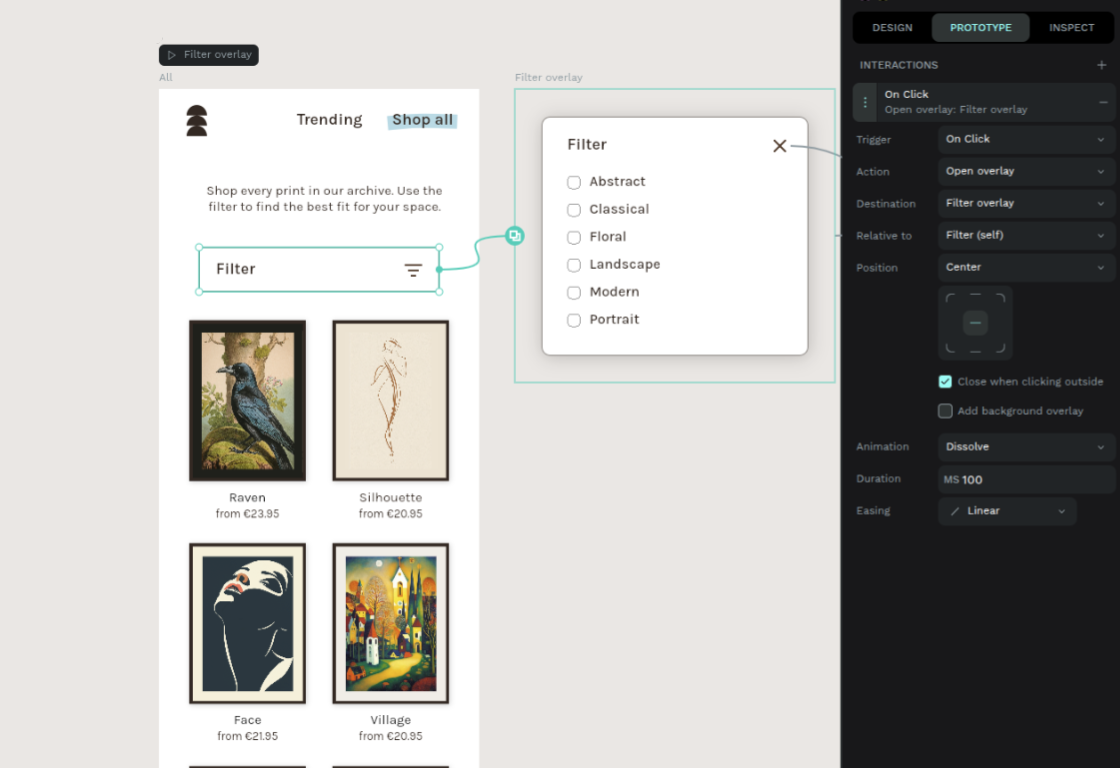
Step 5: Link screens and add interactions
Connecting your screens transforms static layouts into actual experiences. Navigation flows should be logical, consistent, and easy to retrace. Micro-interactions like taps, hovers, or form validation add realism and highlight usability issues early.
Transitions also matter. They not only enhance the look and feel but also clarify how users move between states.
Advanced design tools will support logic and variables, letting you simulate real behavior rather than simple page jumps. The result is a prototype that behaves more like the finished product, giving you richer feedback when testing.
Step 6: Test and share your prototype
With the prototype in place, test it with users and stakeholders. Plan sessions around your original goals, and create scenarios that reflect real-world contexts. Avoid overexplaining — let users react naturally and think aloud as they navigate.
Modern platforms will also extend your testing capabilities. Remote testing, session recording, or embedded analytics help capture real behavior. Stakeholders can also just leave comments directly on the prototype, reducing communication gaps. The prototype becomes not just a visualization, but an active learning tool for the whole team.
Step 7: Iterate and refine
Analyze the feedback, identify patterns, and prioritize improvements. Focus first on usability problems and high-impact issues. Keep in mind that not all suggestions add value — filter them against your prototype’s goals.
Iteration today is supported by AI, which can flag inconsistencies, suggest alternative flows, or check accessibility. These capabilities accelerate refinement and expand what teams can discover between cycles. Save feedback for future iterations and retest as needed to confirm progress.
Create your next prototype with Penpot
When you’re ready to move from concept to reality, choose a design tool that supports seamless collaboration, interactive design, and developer-friendly features. Penpot’s open-source platform offers real-time teamwork, reusable components, design tokens, and intuitive prototyping. It brings designers and developers together with a shared foundation, making the prototype not just a mockup but part of the product-building process itself.
Penpot can move your design from the first moment of stakeholder buy-in to the final stages of developer handoff, even for those brand-new to prototyping. Get extra help from the supportive community, pre-made templates, or our video on creating a prototype.
Sign up for free and start building your next prototype with Penpot today.
Prototyping FAQs
How long should I spend on prototyping before moving to development?
The time investment depends on your project’s complexity and risk factors, but generally, you should prototype until you can confidently answer your key design questions. Also, if you have more time for a project, you may entertain several rounds of prototyping; if you have less, one or two may be enough.
Can I use my prototype directly for development?
Modern design platforms like Penpot generate useful code snippets from designs, but prototypes are primarily design and testing tools rather than production-ready applications. Use prototypes to guide development decisions and provide specifications, but use dedicated development resources to create your final product design.
How do I choose the right online design platform for prototyping?
Look for prototyping tools like Penpot that offer user-friendly interfaces, collaborative features, and the ability to add interactions and test prototypes. Consider your team’s needs, project complexity, and whether you want built-in design libraries or code export options.
How do I keep my prototype organized as it grows?
Use clear naming conventions for screens and components, and group related elements together in your design platform. Take advantage of features like layers, folders, and project organization tools to maintain clarity.