How to make a mood board for your next app or website design
When you go through the process of creating a mood board, you get a better idea of the feeling your product should evoke for users. Here’s how to make a mood board you can be proud of.
Mood boards play an important role in defining what your next digital product will be. Is it playful? Authoritative? Dark?
When you go through the process of creating a mood board, you’ll answer these questions and get a better idea of the feeling your product should evoke for users. Here’s how to make a mood board you can be proud of.
1. Establish your goal
Unlike natural, human moods, which come and go and may not be based on anything rational, mood boards have a specific purpose. They are very intentional. If you start a mood board without defining its intent, you run the risk of veering off into interesting themes and experimental designs without any real connection to the product you want to create.
Mood boards, while hubs of creativity, must begin with the end in mind. Establish this before you begin searching for inspiration.

2. Determine your container
Mood boards could traditionally be made from any medium, including newspaper clippings, paint swatches, or photographs stuck to the wall. As more forms of media became digitized, tools like Pinterest took their place. In fact, most designers today prefer a digital container to display their boards as it helps with collaboration.
It’s important to pick a “container” or board platform early on, too. Figure out who will collaborate on the mood board, how you will share, and what the iteration process will look like. Then, choose a software solution that supports these aims. You may even pick one that comes with a mood board template to help jump-start the creative process.
By using a tool like Penpot, your mood board can live in the same environment as future wireframes and prototypes. You’ll have the same tool for all phases of a project’s ideation and development. This sets the stage for a consistent future workflow for all team members and can even include the client when you wish.

3. Collect inspiration
Now comes the ideation phase. This is the place where teams can throw out all of their best (or worst) ideas for colors, values, themes, emotions, or style. You may want to start from scratch using just your imagination to come up with ideas. Or you could pick a few products, websites, or experiences as inspiration before you ever choose your first element.
Once you have a sense of the artistic direction, you can go out in search of specific examples to include on your board. Images, patterns, text styles, colors, and even videos can be included from just about anywhere you find them. As you and your teammates find something interesting, save the image or file to a common space so that you can easily access it later.
Don’t feel limited to only finding inspiration from other apps or websites. Movies, runway fashion, and even recipes could hold elements that can be used to help you create your mood board.
Avoid looking too much at what competitors in your space are doing. You want to bring a truly unique experience to your users, and it is easy to be influenced by the things you see. For the mood board, it may be better to avoid researching other apps in your industry until you’ve finished your mood board.
What if you think you’ll need some offline inspiration to make your mood board pop? You can still use a mixture of physical and digital elements. You’ll just have to decide how you want those physical pieces to be included. Scanning or digitizing them as photo files can solve the problem and make it easy to import these analog items into your fully digitized mood board.
Feel free to include elements that would not appear in the final design, such as animals, art pieces, and food, to represent flavors or memories. Anything that communicates the “vibe” you are going for is fair game to be included in this phase of brainstorming.
(What about design elements, such as font or color palette? You could include pieces of that here, but avoid the temptation to make this a brand style guide. You’ll have a chance to do that later.)

4. Arrange elements
With all of your elements collected, it’s time to put them on the board. If you use a tool like Penpot, import them into your asset library and then arrange them in a way that seems the most visually appealing.
It will likely take you several tries to get everything just right. You may also find out that some of the elements really don’t work well together. Feel free to remove anything from the board you don’t absolutely love. You may end up ditching it altogether or replacing it with another element that conveys that mood a bit better.
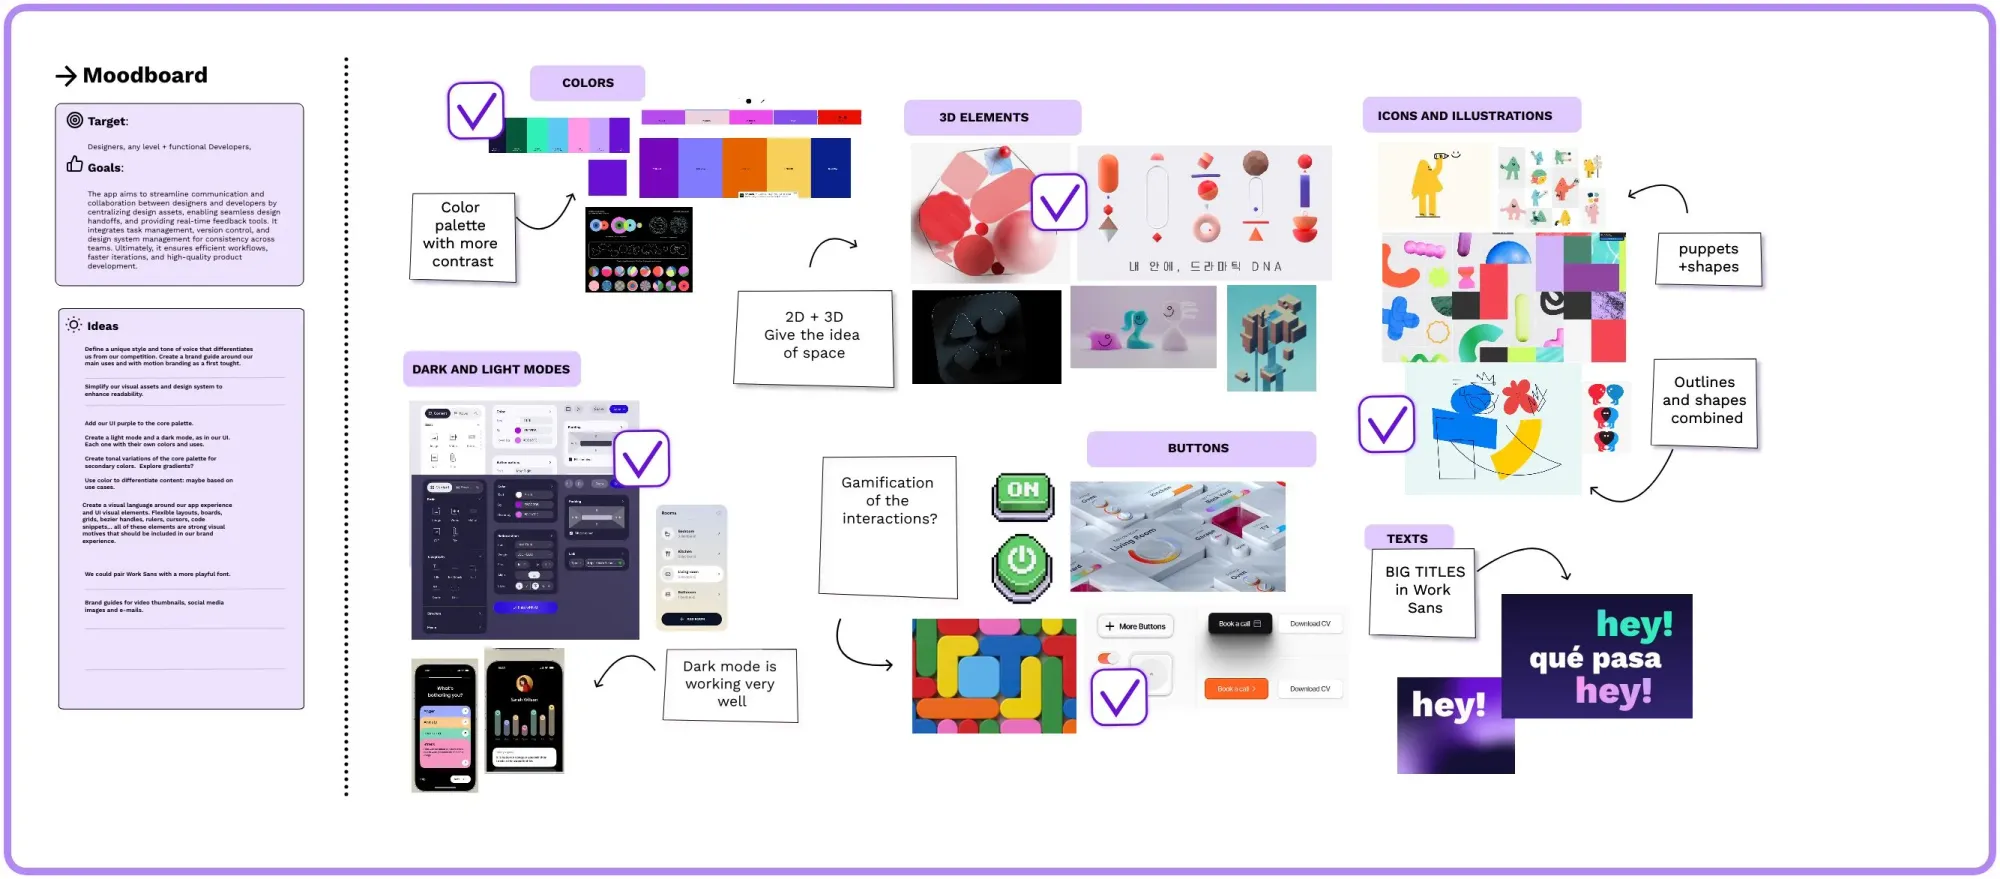
Grouping like elements works for many people. For example, you can group things that represent color, whether it’s actual color swatches or unrelated images that make good use of that color. Your mood board template (if you use one) may already have suggested categories you can use; you may also decide to replace some categories with others that work better for your project.

5. Add text
You may have already included textual elements as pieces of your mood board, but you can also use them to describe your elements. Use fonts that you may eventually use in the final design to make labels, call-outs, and captions that explain the mood board to others.
Other ideas for making the text on your mood board pop include:
- Virtual post-its
- Arrows to indicate the element you are referring to
- Different colors for each of the team members' comments and feedback.
Penpot has a series of templates you can use to implement your mood board and make the workflow easier.
6. Make multiple versions
After you’ve done your first mood board (or during), you may want to create one or two other boards. These can be alternates that represent different directions your app or website might go in or more drilled-down boards that address a specific aspect of your site.
Mood boards take a lot of time, so the same team may not end up creating all of the boards. Instead, have different teams tackle each board; this helps create a truly unique mood for each one and gives every group a chance to pitch the vibes and elements that they love most.
7. Get feedback
A mood board is meant to be shared, and the Penpot app makes it easy to get feedback from internal and external stakeholders. Share the board, make comments, see edit history, and easily update elements with new ones as needed. Collaborators can easily add a few new items or help you do a complete revamp.
The Penpot 2.4 release introduces a new "Viewer" role for team members, enabling you to share your board with clients and collaborators in a view-only mode. This feature allows you to control who can actively contribute to the moodboard's creation and who can only observe and provide feedback through the comment section.
The Penpot interface is completely web-based, so teams can log in from anywhere and add their notes when it’s most convenient. Plus, everyone will be working from the same version, so there’s no confusion about who has seen what.
8. Display the final version
With all of the iterations complete, you finally have your official mood board! You can share it through a URL and give all internal teams access to review when needed. Since it’s completely digital, designers can reference it as they move into the next part of your site or app design.
9. Draw on it for final style choices
As teams create wireframes and prototypes, they can easily revisit the mood board for inspiration. It can also serve as a go-to for company-wide design decisions. Perhaps the color of the mood board will become the foundation for a future brand kit! Because everything on the mood board is well-documented inside Penpot, it’s easily accessible for whatever design needs your teams have in the future.
Start your mood board in minutes
Making a mood board can take weeks — or longer — but you can set the stage for success right now. Sign up for a free Penpot account and check out the UI design beginner’s guide. Your journey of turning your ideas into reality starts today!
Related Blog posts
We have even more posts about using Penpot as a design thinking board. Here’s a few examples of handy articles to help you get the most out of Penpot.
